

§SQLデータベースへのアクセス
注意: JDBCはブロッキング操作であり、スレッドが待機することになります。コントローラーで直接JDBCクエリを実行すると、Playアプリケーションのパフォーマンスに悪影響を与える可能性があります!「カスタムExecutionContextの設定」セクションを参照してください。
§JDBC接続プールの設定
PlayはJDBC接続プールの管理のためのプラグインを提供します。必要に応じて、複数のデータベースを設定できます。
データベースプラグインを有効にするには、ビルド依存関係を追加します。
- Java
-
libraryDependencies ++= Seq( javaJdbc ) - Scala
-
libraryDependencies ++= Seq(
  jdbc
)
§JDBCドライバ依存関係の設定
Playはデータベースドライバを提供しません。そのため、本番環境にデプロイするには、アプリケーション依存関係としてデータベースドライバを追加する必要があります。
たとえば、MySQL5を使用する場合は、コネクタの依存関係を追加する必要があります。
libraryDependencies ++= Seq(
  "com.mysql" % "mysql-connector-j" % "8.0.33"
)§データベースの設定
次に、conf/application.confファイルで接続プールを設定する必要があります。慣例により、デフォルトのJDBCデータソースはdefaultと呼ばれ、対応する設定プロパティはdb.default.driverとdb.default.urlです。
# Default database configuration
db.default.driver=org.h2.Driver
db.default.url="jdbc:h2:mem:play"
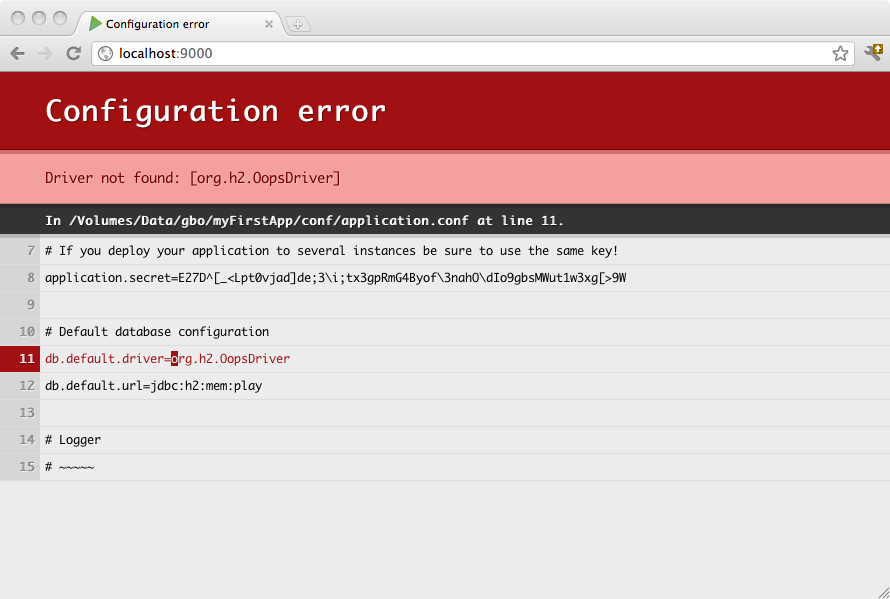
適切に設定されていない場合は、ブラウザに直接通知されます。
play.db.defaultを設定して、default名を変更することもできます。例:
play.db.default = "primary"

db.primary.driver=org.h2.Driver
db.primary.url="jdbc:h2:mem:play"
§複数のデータソースを設定する方法
複数のデータソースを設定するには
# Orders database
db.orders.driver=org.h2.Driver
db.orders.url="jdbc:h2:mem:orders"

# Customers database
db.customers.driver=org.h2.Driver
db.customers.url="jdbc:h2:mem:customers"
§H2データベースエンジン接続プロパティ
インメモリデータベース
# Default database configuration using H2 database engine in an in-memory mode
db.default.driver=org.h2.Driver
db.default.url="jdbc:h2:mem:play"
ファイルベースのデータベース
# Default database configuration using H2 database engine in a persistent mode
db.default.driver=org.h2.Driver
db.default.url="jdbc:h2:/path/to/db-file"
H2データベースURLの詳細は、H2 Database Engine Cheat Sheetを参照してください。
§SQLiteデータベースエンジン接続プロパティ
# Default database configuration using SQLite database engine
db.default.driver=org.sqlite.JDBC
db.default.url="jdbc:sqlite:/path/to/db-file"
§PostgreSQLデータベースエンジン接続プロパティ
# Default database configuration using PostgreSQL database engine
db.default.driver=org.postgresql.Driver
db.default.url="jdbc:postgresql://database.example.com/playdb"
§MySQLデータベースエンジン接続プロパティ
# Default database configuration using MySQL database engine
# Connect to playdb as playdbuser
db.default.driver=com.mysql.jdbc.Driver
db.default.url="jdbc:mysql:///playdb"
db.default.username=playdbuser
db.default.password="a strong password"
§JNDI経由でのデータソースの公開
一部のライブラリは、JNDIからDatasource参照を取得することを想定しています。conf/application.confにこの設定を追加することで、JNDIを介してPlayで管理されているデータソースを公開できます。
db.default.driver=org.h2.Driver
db.default.url="jdbc:h2:mem:play"
db.default.jndiName=DefaultDS
§SQLログステートメントの設定方法
すべての接続プールが(すぐに使える状態で)SQLステートメントをログに記録する方法を提供しているわけではありません。たとえばHikariCPは、データベースベンダーのログ機能を使用することを推奨しています。HikariCPのドキュメントより
ログステートメントテキスト/低速クエリロギング
ステートメントキャッシングと同様に、ほとんどの主要なデータベースベンダーは、独自のドライバのプロパティを通じてステートメントロギングをサポートしています。これには、Oracle、MySQL、Derby、MSSQLなどが含まれます。低速クエリロギングをサポートするものもあります。これは「開発時」機能と見なしています。これをサポートしていない少数のデータベースの場合、jdbcdslog-expは良い選択肢です。開発とプレプロダクション中に非常に役立ちます。
そのため、Playはjdbcdslog-expを使用して、サポートされているプールに対して一貫したSQLログステートメントサポートを有効にします。SQLログステートメントは、logSqlプロパティを使用してデータベースごとに設定できます。
# Default database configuration using PostgreSQL database engine
db.default.driver=org.postgresql.Driver
db.default.url="jdbc:postgresql://database.example.com/playdb"
db.default.logSql=true
その後、マニュアルの説明に従ってjdbcdslog-expのログレベルを設定できます。基本的に、ルートロガーをINFOに設定し、jdbcdslog-expがログに記録する内容(接続、ステートメント、結果セット)を決定する必要があります。ログを設定するためのlogback.xmlの例を以下に示します。
<?xml version="1.0" encoding="UTF-8" ?>
<!--
   Copyright (C) from 2022 The Play Framework Contributors <https://github.com/playframework>, 2011-2021 Lightbend Inc. <https://www.lightbend.com>
-->

<!DOCTYPE configuration>

<configuration>
  <import class="ch.qos.logback.classic.encoder.PatternLayoutEncoder"/>
  <import class="ch.qos.logback.classic.AsyncAppender"/>
  <import class="ch.qos.logback.core.FileAppender"/>
  <import class="ch.qos.logback.core.ConsoleAppender"/>

  <appender name="FILE" class="FileAppender">
    <file>${application.home:-.}/logs/application.log</file>
    <encoder class="PatternLayoutEncoder">
      <pattern>%date [%level] from %logger in %thread - %message%n%xException</pattern>
    </encoder>
  </appender>

  <appender name="STDOUT" class="ConsoleAppender">
    <encoder class="PatternLayoutEncoder">
      <pattern>%highlight(%-5level) %logger{15} - %message%n%xException{10}</pattern>
    </encoder>
  </appender>

  <appender name="ASYNCFILE" class="AsyncAppender">
    <appender-ref ref="FILE"/>
  </appender>

  <appender name="ASYNCSTDOUT" class="AsyncAppender">
    <appender-ref ref="STDOUT"/>
  </appender>

  <logger name="play" level="INFO"/>
  <logger name="org.jdbcdslog.ConnectionLogger" level="OFF"/> <!-- Won' log connections -->
  <logger name="org.jdbcdslog.StatementLogger" level="INFO"/> <!-- Will log all statements -->
  <logger name="org.jdbcdslog.ResultSetLogger" level="OFF"/>  <!-- Won' log result sets -->

  <root level="WARN">
    <appender-ref ref="ASYNCFILE"/>
    <appender-ref ref="ASYNCSTDOUT"/>
  </root>

</configuration>警告:これは開発環境でのみ使用することを意図したものであり、パフォーマンスの低下とログの汚染を引き起こすため、本番環境では設定しないでください。
§JDBCデータソースへのアクセス
Playデータベースパッケージは、主にDatabase(JavaとScalaのドキュメントを参照)クラスを介して、デフォルトのデータソースへのアクセスを提供します。
- Java
-
import java.util.concurrent.CompletableFuture; import java.util.concurrent.CompletionStage; import javax.inject.*; import play.db.*; @Singleton class JavaApplicationDatabase { private Database db; private DatabaseExecutionContext executionContext; @Inject public JavaApplicationDatabase(Database db, DatabaseExecutionContext context) { this.db = db; this.executionContext = executionContext; } public CompletionStage<Integer> updateSomething() { return CompletableFuture.supplyAsync( () -> { return db.withConnection( connection -> { // do whatever you need with the db connection return 1; }); }, executionContext); } } - Scala
-
import javax.inject.Inject

import scala.concurrent.Future

import play.api.db.Database

class ScalaApplicationDatabase @Inject() (db: Database, databaseExecutionContext: DatabaseExecutionContext) {
  def updateSomething(): Unit = {
    Future {
      db.withConnection { conn =>
        // do whatever you need with the db connection
      }
    }(databaseExecutionContext)
  }
}
デフォルト以外のデータベースの場合
- Java
-
import java.util.concurrent.CompletableFuture; import java.util.concurrent.CompletionStage; import javax.inject.Inject; import javax.inject.Singleton; import play.db.Database; import play.db.NamedDatabase; @Singleton class JavaNamedDatabase { private Database db; private DatabaseExecutionContext executionContext; @Inject public JavaNamedDatabase( // inject "orders" database instead of "default" @NamedDatabase("orders") Database db, DatabaseExecutionContext executionContext) { this.db = db; this.executionContext = executionContext; } public CompletionStage<Integer> updateSomething() { return CompletableFuture.supplyAsync( () -> db.withConnection( connection -> { // do whatever you need with the db connection return 1; }), executionContext); } } - Scala
-
import javax.inject.Inject

import scala.concurrent.Future

import play.api.db.Database
import play.db.NamedDatabase

class ScalaNamedDatabase @Inject() (
    @NamedDatabase("orders") ordersDatabase: Database,
    databaseExecutionContext: DatabaseExecutionContext
) {
  def updateSomething(): Unit = {
    Future {
      ordersDatabase.withConnection { conn =>
        // do whatever you need with the db connection
      }
    }(databaseExecutionContext)
  }
}
どちらの場合も、withConnectionを使用すると、ブロックの最後に接続が自動的に閉じられます。
§JDBC接続の取得
同じ方法でJDBC接続を取得できます。
- Java
-
import java.sql.Connection; import java.util.concurrent.CompletableFuture; import java.util.concurrent.CompletionStage; import javax.inject.Inject; import play.db.Database; class JavaJdbcConnection { private Database db; private DatabaseExecutionContext executionContext; @Inject public JavaJdbcConnection(Database db, DatabaseExecutionContext executionContext) { this.db = db; this.executionContext = executionContext; } public CompletionStage<Void> updateSomething() { return CompletableFuture.runAsync( () -> { // get jdbc connection Connection connection = db.getConnection(); // do whatever you need with the db connection return; }, executionContext); } } - Scala
-
import javax.inject.Inject

import scala.concurrent.Future

import play.api.db.Database

class ScalaJdbcConnection @Inject() (db: Database, databaseExecutionContext: DatabaseExecutionContext) {
  def updateSomething(): Unit = {
    Future {
      // get jdbc connection
      val connection = db.getConnection()

      // do whatever you need with the db connection

      // remember to close the connection
      connection.close()
    }(databaseExecutionContext)
  }
}
結果として得られる接続は、リクエストサイクルの最後に自動的に破棄されないことに注意することが重要です。言い換えれば、プールにすぐに返すために、コード内のどこかで`close()`メソッドを呼び出す責任があります。
§CustomExecutionContextの使用
JDBCを使用する際には、常にカスタム実行コンテキストを使用し、Playのレンダリングスレッドプールが完全に結果のレンダリングに集中し、コアを最大限に活用できるようにする必要があります。PlayのCustomExecutionContext(JavaとScalaのドキュメントを参照)クラスを使用して、JDBC操作専用のカスタム実行コンテキストを設定できます。詳細については、JavaAsync/ScalaAsyncおよびThreadPoolsを参照してください。
PlayのダウンロードページにあるブロッキングAPI(つまり、Anorm、JPA)を使用するPlayのすべての例テンプレートは、必要に応じてカスタム実行コンテキストを使用するように更新されています。例:
- Scala: playframework/play-scala-anorm-example/に移動すると、CompanyRepositoryクラスがすべてのデータベース操作をラップする
DatabaseExecutionContextを受け取ることがわかります。 - Java: playframework/play-java-jpa-exampleに移動すると、JPAPersonRepositoryクラスがすべてのデータベース操作をラップする
DatabaseExecutionContextを受け取ることがわかります。
JDBC接続プールを含むスレッドプールのサイズ設定については、スレッドプールエグゼキュータを使用して、接続プールと一致する固定スレッドプールサイズが必要です。HikariCPのプールサイズ設定ページのアドバイスに従って、物理コア数の2倍、プラスディスクスピンドルの数にJDBC接続プールを設定する必要があります。つまり、4コアCPUと1つのディスクがある場合、プールには合計9個のJDBC接続があります。
# db connections = ((physical_core_count * 2) + effective_spindle_count)
fixedConnectionPool = 9

database.dispatcher {
  executor = "thread-pool-executor"
  throughput = 1
  thread-pool-executor {
    fixed-pool-size = ${fixedConnectionPool}
  }
}
§接続プールの設定
Playは、デフォルトでHikariCPをデータベース接続プールのデフォルト実装として使用します。また、完全修飾クラス名を指定することで、play.api.db.ConnectionPoolを実装する独自のプールを使用することもできます。
play.db.pool=your.own.ConnectionPool
接続プールの設定オプションの全範囲については、PlayのJDBC reference.confのplay.db.prototypeプロパティを確認してください。
§テスト
インメモリデータベースの設定方法など、データベースを使用したテストの詳細については、
§Playデータベースの進化の有効化
Playデータベースの進化が役に立つものについてはEvolutionsを読んで、使用方法の手順に従ってください。
次へ: インメモリH2データベースの使用
このドキュメントにエラーが見つかりましたか?このページのソースコードはこちらにあります。ドキュメントガイドラインを読んだ後、プルリクエストを送信して自由に貢献してください。質問やアドバイスを共有したいですか?コミュニティフォーラムにアクセスして、コミュニティとの会話を始めましょう。